by Barbara Lehtiniemi
Creative ideas arrive in bursts of energy. I find the trick is to capture the energy before the idea falls lifeless onto the dust heap of good intentions.
During a coffee meet-up this summer, Jessica MacLeod showed me a 4-panelled sketch she had started. She’d gotten the idea from watching a Youtube video from artist Cate Field. Jessica suggested I might want to try the same technique on a painting.
I’m new to painting and enjoying the newbie phase of fearless experimentation. While the 4-panelled idea was still pulsing with energy, I got to work with masking tape and a fresh sheet of paper.
The nitty-gritty:
Materials:
The steps:
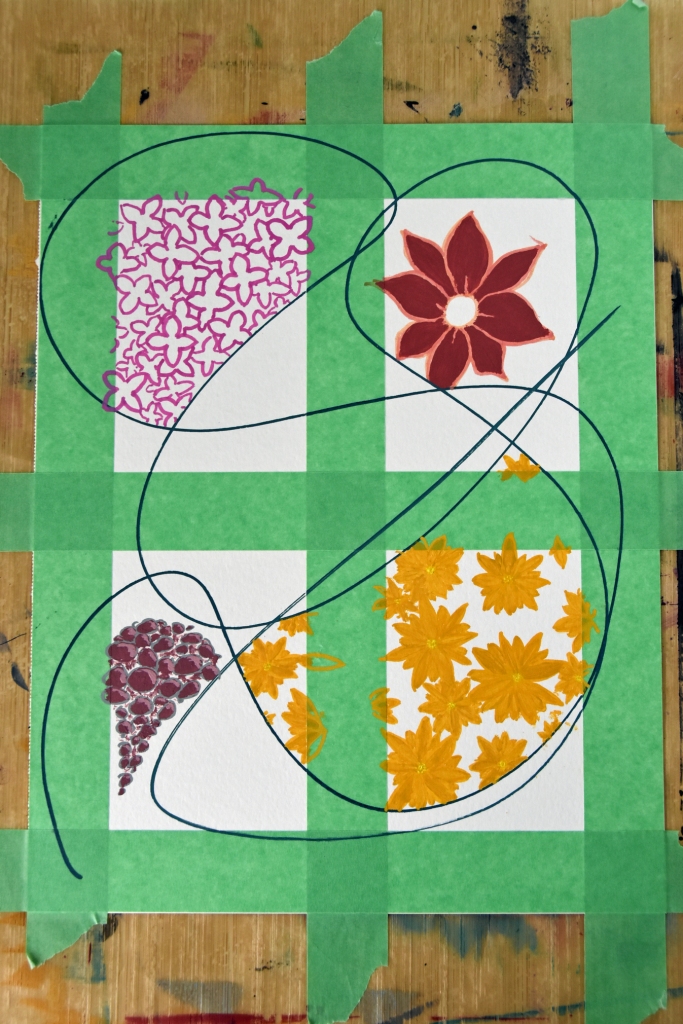
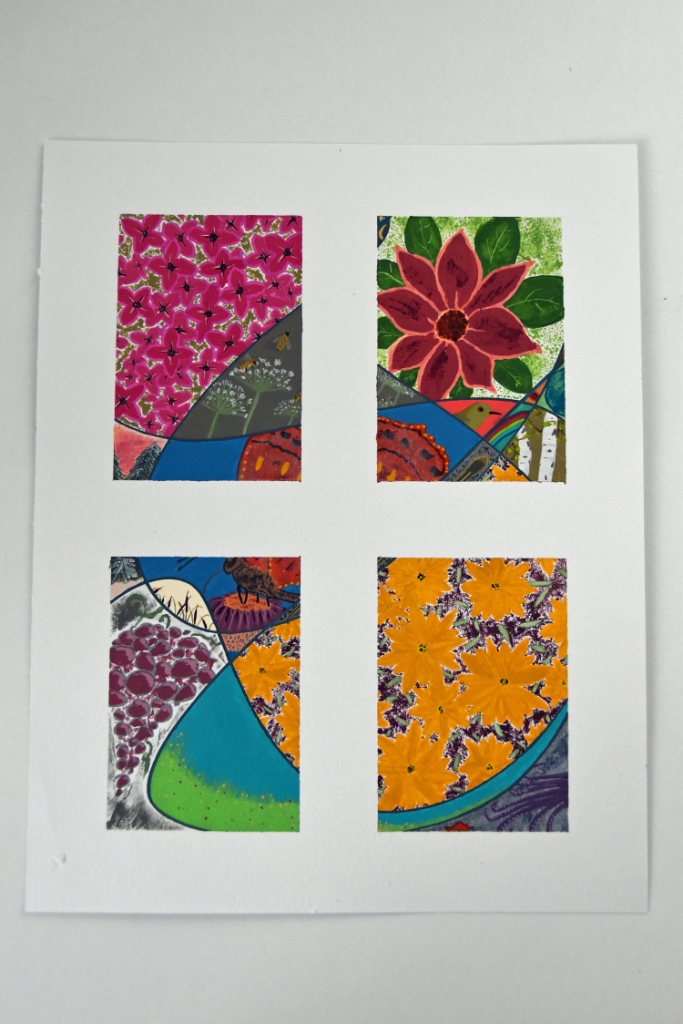
1.I used masking tape to define four equal panels (one strip of tape along each side of the paper, plus one vertically and one horizontally across the centre.) I measured to make sure the centre strips were precisely placed. I made the tape strips extra long so I could tape the whole piece to a thin sheet of vinyl. The vinyl protected and supported the paper, as well as functioned as a drop sheet on my painting table.
2. With an acrylic paint marker, I drew a one-line scribble of swoops and curves over the whole piece, without regard to what landed on paper and what landed on masking tape. The line began and ended on masking tape. The free-form line created a series of odd-shaped fields of various sizes. Some fields were wholly contained within a single panel, while others spanned two or more panels.
3. Starting with the largest field in each of the four panels, I used different coloured paint markers to outline some flowers. I later used paint to fill in the outlines and add detail. Not having first painted a background in those fields (oops!), I later painted in some background colour and leaves.
4. Then I worked on the centre field, which spans into three of the panels. I used pencil to sketch the butterfly’s body and wings, and later painted and added detail.
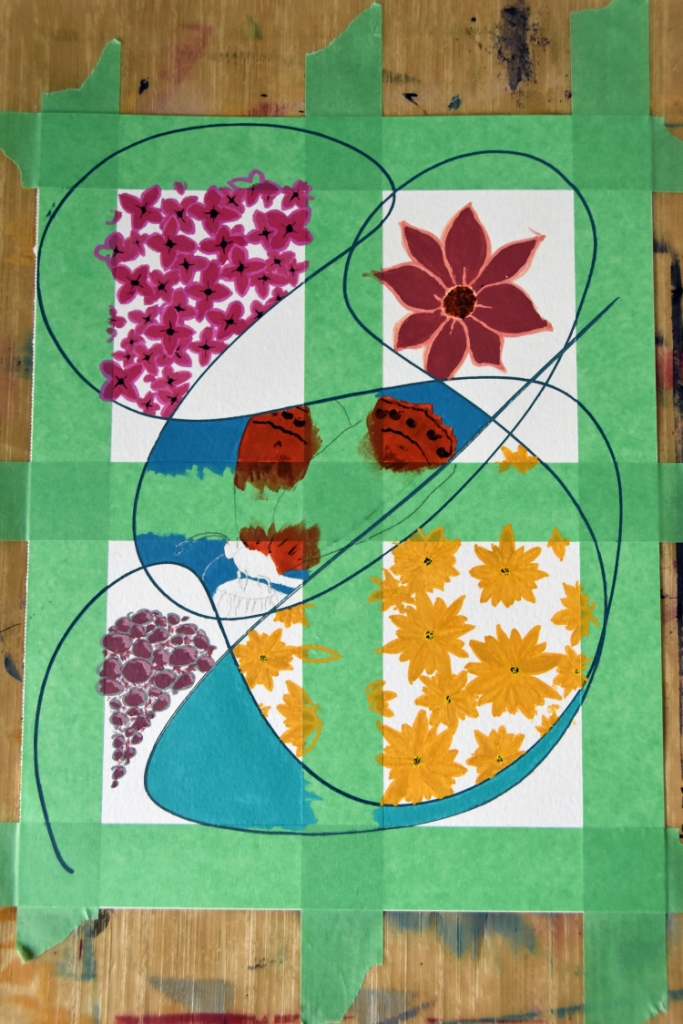
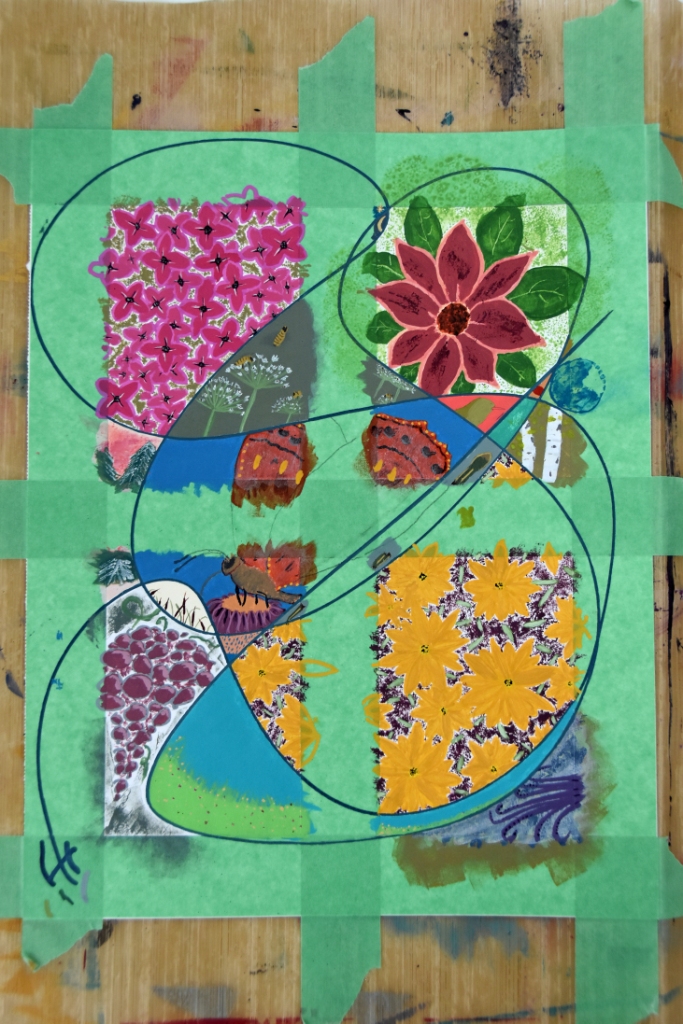
5. The rest of the fields I worked through in bits and pieces. I didn’t have a particular plan for what to paint in each field, but since my theme was revealing itself to be the nature, I chose elements to fit that theme: Flowers, grapes (they were meant to be wisteria blossoms but chose to be grapes), grass, trees, a butterfly, a bird, a snake, an octopus, some bees, a ladybug, cattails, rain, a rainbow, a star, the moon, the earth.
6. Having accidentally brushed paint over the paint-marker line in places, I swabbed a fine tip paintbrush across the tip of the marker and painted over my slops.
7. When all painting was completed and dry, I carefully peeled off the masking tape. The tape had been in place for over three months, so I softened the adhesive slightly by placing a heated (170°F) cookie sheet under the painting. I had to re-heat the cookie sheet at one point, as the tape was trying to pull up a layer of paper.
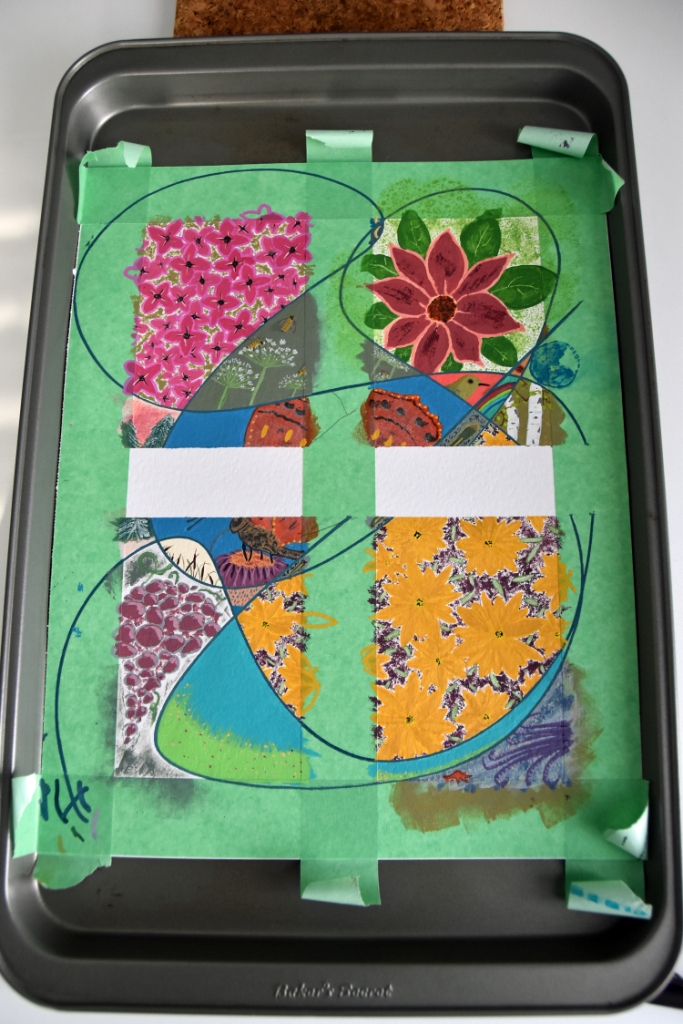
8. Final step: Uncork wine and admire the finished piece!
Observations:
- narrower masking tape would have been better (I used what I had on hand)
- I wish I had thought to take photos of every stage right from the beginning
- before adding the paint-marker free-form line, it might have been better to add a background colour or wash to each field
- practicing sketches before adding them to the painting paid off; so did using photographs for reference.
- smaller fields present the greatest challenge.
Exciting to see how others work through a project. Share something of yours by sending text & images to cagac.ca@gmail.com
